How to Add NFT to MetaMask Wallet: A Full Guide
metaverse
Non-fungible tokens (NFTs) first appeared in 2014, when Kevin McCoy created a way to prove digital authenticity and ownership for his piece of art. Three years later, NFTs rose in popularity, quickly becoming a global phenomenon. Since then, many crypto enthusiasts have been wondering how to add NFT to MetaMask for safe storage and easy management.
Today, NFTs are highly versatile assets that have both value and utility. As their use cases increase, so does the demand for wallets that are compatible with them. MetaMask, being an Ethereum-based wallet, emerged as an obvious choice for the majority of users.
But how exactly do you send NFTs to it? And what should you do in the event of an NFT not showing up at all? We answer all these questions and more in this comprehensive guide on how to add NFT to MetaMask.
How to Add an NFT to MetaMask Wallet
The process of adding an NFT to your MetaMask wallet will vary slightly depending on whether you’re using a browser extension or a mobile app.
First off, the MetaMask wallet has an autodetect feature, which can often automatically find your NFTs that are on the Ethereum mainnet. However, there’s also an option to add it manually.
Here’s a step-by-step guide on how to manually add NFTs to the MetaMask mobile wallet:
- Copy the NFT’s address. Every NFT comes with a unique address attached to the smart contract used to create it. That address is a long string of numbers and letters that you can copy. For example, on OpenSea, you can find the NFT address by going to “Details” and then “Contract Address.”
- Copy the NFT’s ID. In addition to the address, every NFT comes with a unique ID you can use to identify and track it. Its structure varies between platforms, but it’s usually a short string of numbers starting with the symbol “#.”
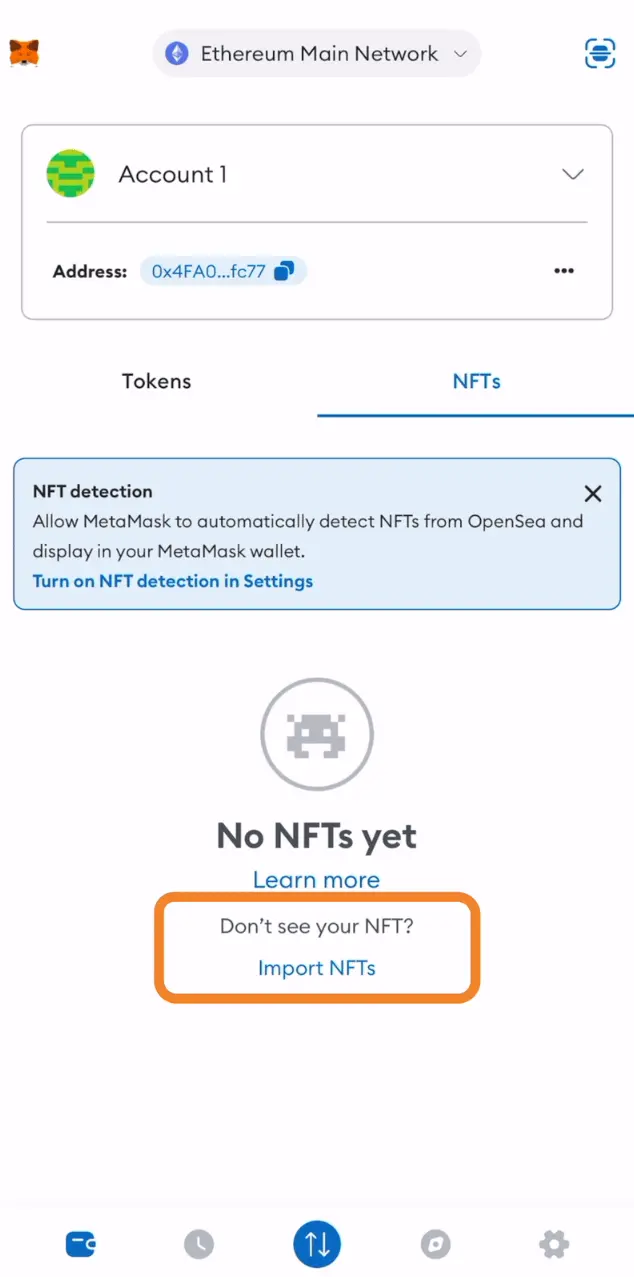
- Navigate to the NFT section in your MetaMask Mobile wallet. After opening the app, you’ll find the NFTs tab, where you can see and manage your assets.
- Import NFTs. Tap on the “Import NFTs” link to open up a section where you can paste the information about your asset. You’ll find “Address” and “ID” boxes where you can insert the details and see your NFT appear.
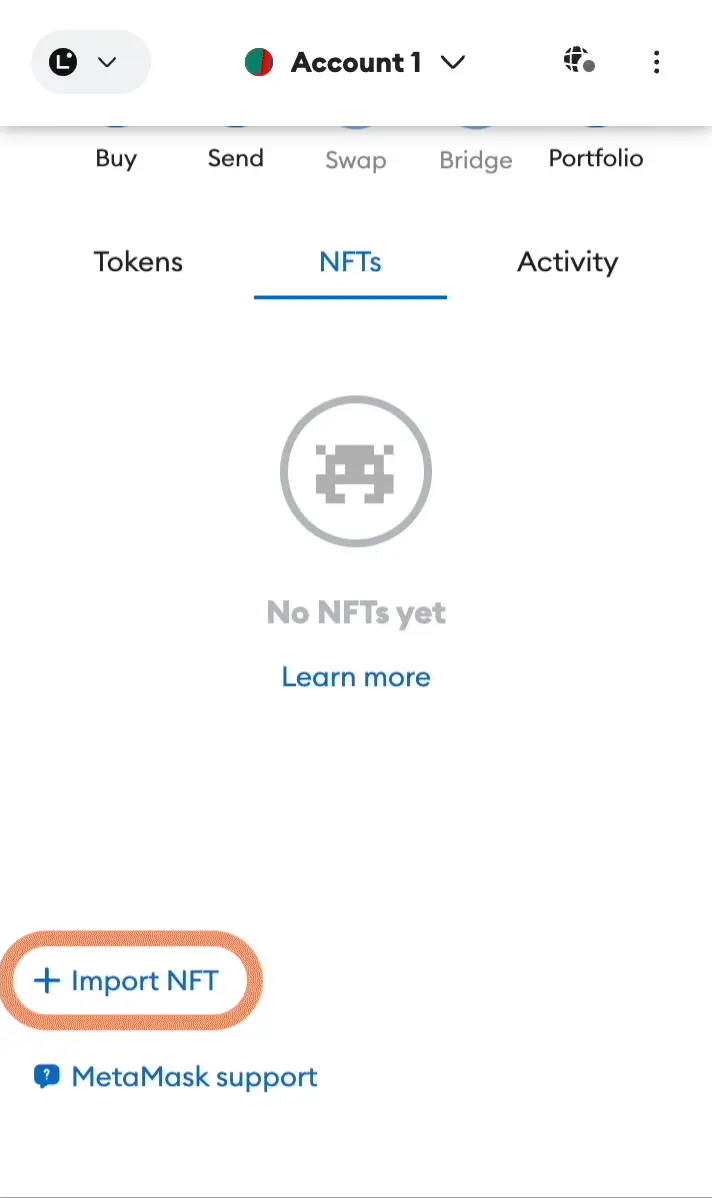
Now that we know how to find the NFT address and ID, let’s see how to transfer NFTs to MetaMask using a browser wallet:
- Copy the address and ID of the NFT.
- Go to the NFTs section in your wallet.
- Paste relevant details into the “Address” and “Token ID” boxes.
- Click “Import.”
How to Receive an NFT on MetaMask Wallet
In many cases, you’ll receive your NFT in your MetaMask wallet automatically after buying it. That’s because you generally have to connect your wallet to a marketplace before making a purchase. Notable marketplaces where you can buy NFTs include OpenSea, Rarible, SuperRare, and Mintable.
However, if you don’t see the NFT in your wallet automatically or if you buy it over the counter, you can follow these steps to receive the asset:
- Give the sender your public address. You can find your MetaMask public address at the top of the main page, right below your account.
- Ensure that you can cover gas fees. Asset transfers on every blockchain require paying a fee in the network’s native cryptocurrency. That means you should have enough ETH if your NFT is on the Ethereum network, MATIC tokens for the Polygon platform, etc.
- Notify the sender to send the NFT after you’ve ensured that all the conditions are met.
- Look for the NFT in your MetaMask wallet after it arrives.
Remember to pay attention to whether you’re using the correct network when receiving an NFT. If you use the wrong address from the wrong blockchain, the transaction either won’t go through or could result in a permanent loss of the asset!
What to Do if an NFT Is Not Showing on MetaMask
If an NFT is not showing up in your MetaMask wallet, you should first check if you have the autodetect feature enabled. To do that, head over to your wallet’s “Security and Privacy” section in the settings and enable “Autodetect NFTs.”
You could’ve also made a mistake when adding the NFT. For instance, you could’ve copied the wrong Token ID, in which case you’ll likely encounter the “You’re not the owner of this NFT” error.
Another potential mistake can occur when trying to use the browser extension to add an NFT using the Custom Token tab. While MetaMask supports a wide range of ERC-20, ERC-721, and ERC-1155 tokens with this feature, you need to use the NFT-specific option to add them to your wallet.
Ultimately, this is not a common problem with the MetaMask wallet. When it does happen, chances are that applying some of the steps above will fix the issue. As a final solution, you can always manually add your NFT to your wallet to ensure it’s right where you want it to be.
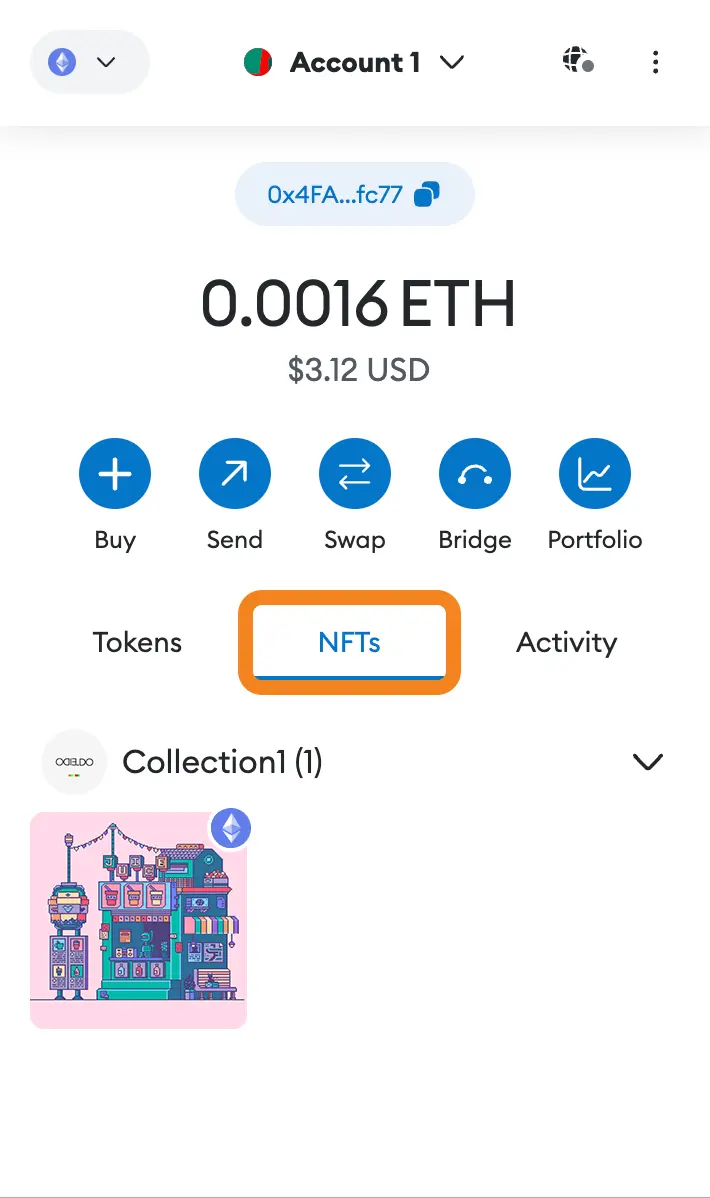
How to View Your NFT on MetaMask
You can view NFTs in your MetaMask wallet by navigating the NFT category. Both mobile apps and browser extensions feature a dedicated NFT section that you can use to view your assets, manage collections, and more. You can access this section of your wallet from the main page, and it looks like this:
Another way to view your NFTs is to use MetaMask Portfolio, which is a standalone, complementary app designed to simplify asset management. The Portfolio allows you to connect your wallet by simply clicking on the “Connect MetaMask” button. Moreover, you can use it to watch any wallet by inputting its address or ENS name.
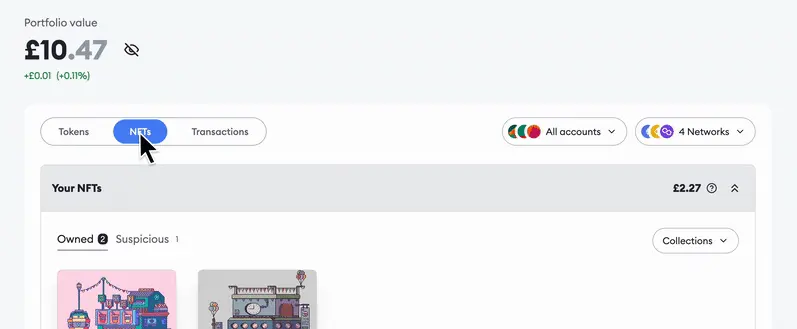
Once you have the MetaMask portfolio set up, you’ll find your non-fungible tokens in the “NFTs” section, like in the following example:
What Will Happen to Your NFT If You Reset MetaMask?
Your NFTs (along with all the other assets and tokens) should remain in your MetaMask wallet when you reset it. However, it’s crucial to know what you’re doing before resetting the wallet.
First off, there are two ways to reset MetaMask, so let’s examine each one:
- Account reset refers to the process of clearing your account of any activity. This procedure is not recommended for beginners and should only be done in cases of stuck transactions. That’s why account resets are mostly done by developers for testing purposes. Lastly, they only affect the selected network, leaving others intact.
- Wallet reset is more commonly practiced by users who want to reset their password or completely remove their MetaMask wallet from a device. Before performing a wallet reset, it’s essential to have your secret recovery phrase written down, as it’s the only way to access your funds afterward.
Resetting your wallet using a browser extension is as easy as removing the extension and reinstalling it again. If you’re using a mobile app, you should go to the “Settings” menu, hit the “Lock” option, and then “Reset Wallet.”
In both cases, you’ll have to manually input your recovery phrase before accessing your assets. However, your NFTs and other crypto assets should be waiting for you in your wallet.
Should You Store NFTs on MetaMask?
MetaMask is one of the best software wallets for storing your NFTs. It has more than 20 million active users, which translates into huge community support as well as plenty of user-friendly and security features. Here are several more upsides to using MetaMask to store your NFTs:
- Mobile and PC versions
- Dapp compatibility
- User-friendly interface
- Multi-chain support
- Complementary MetaMask Portfolio app
However, MetaMask is a hot wallet, and that makes it susceptible to online attacks. Smartphones and PCs used to access MetaMask can be hacked, which can result in attackers obtaining your secret keys and stealing your assets.
So, if you have a considerable NFT collection and want to properly secure your holdings, you should look into hardware wallets such as Ledger and Trezor. These are called cold wallets, as they are physical devices that store the keys to your tokens offline, making it impossible for online attackers to reach them.
While a hardware wallet isn’t an infallible solution (you still need to safeguard your seed phrase and not let anyone see it), it is one of the safest options for long-term NFT storage and management.
Key Takeaways
Hopefully, now it’s clear how to add NFT to MetaMask and what to do in cases where there are some issues with viewing or transactions. This knowledge is invaluable to anyone looking to become a serious NFT collector.
Ever since their explosion in popularity in 2021 (the year when Jack Dorsey sold his first tweet as an NFT for $2.9 million), NFTs have been on the radar of many investors and crypto enthusiasts.
Their future is filled with potential and real-world applications, as they can reshape the world of art, collectibles, and even supply chains and real estate. That’s why it’s essential to have the right knowledge when it comes to storing and managing NFTs!
How to Add an NFT to MetaMask FAQ
Can I transfer my NFT to MetaMask?
You can transfer any EVM-compatible NFTs to your MetaMask wallet. NFTs on the Ethereum chain will likely show up automatically, while those on compatible chains like BNB Smart Chain or Polygon might have to be added manually.
What types of NFTs does MetaMask support?
MetaMask supports both ERC-721 and ERC-1155 NFTs on any network. However, that only refers to adding NFTs to the wallet. You can only send ERC-721 assets, though additional features might change that in the future.
How do I fix the “You are not the owner of this NFT” error?
If you encounter the “You are not the owner of this NFT” error, you should use a block explorer, such as Etherscan, to verify that you own the asset. Furthermore, you should verify that you’re using the correct MetaMask account and the proper network to add the NFT to.